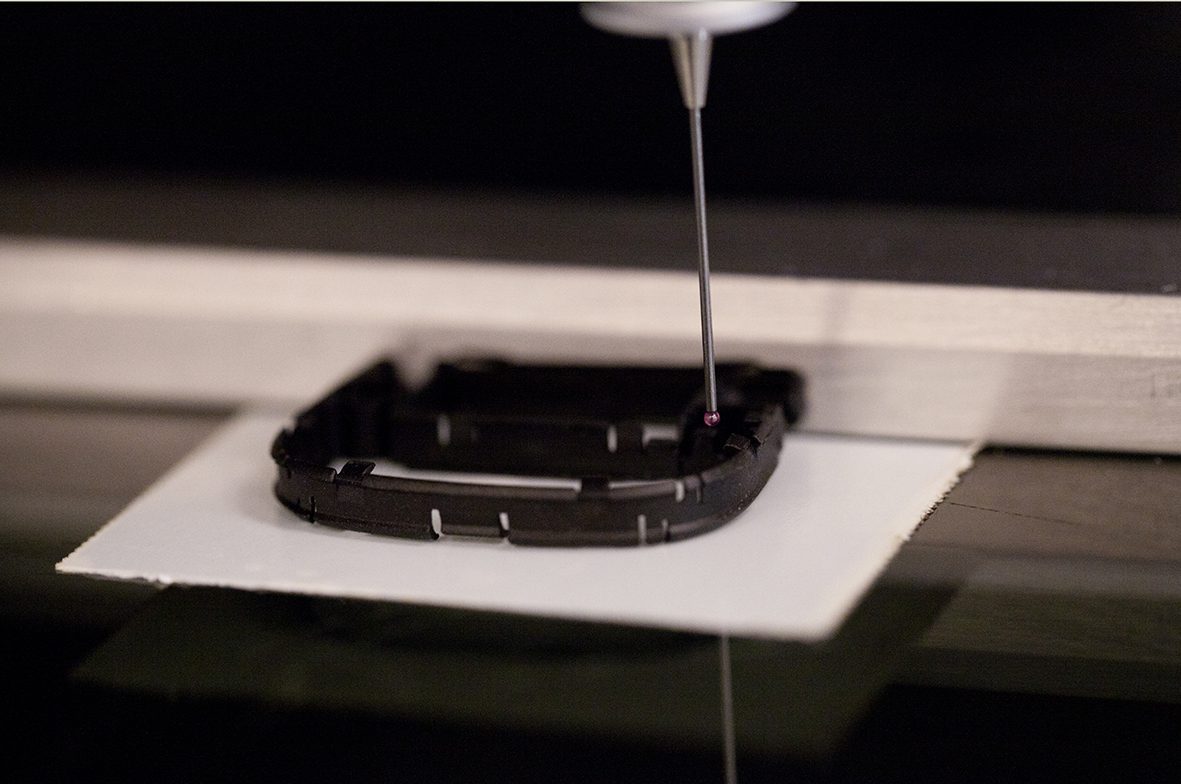
The manufacturing of injection-moulded parts requires maximum precision and accuracy. But, how does one ensure that these small components with such extreme tolerances are precise and accurate? Over the years, we have invested heavily in checks and measuring to avoid any defects and variations of the components.
Precision and accuracy play a key role in safely delivering treatment to patients
As the moulding tools and in injection-moulded parts that we design and manufacture are mainly used in medicine and biotechnology, the precision and accuracy of these products also play a key role in safely delivering various types of treatment to patients. Therefore it has always been and is crucial for us to have the best equipment to carry out measurements.
A measuring machine with multi-sensor technology
Actually, we were one of the first companies in the world to adopt a unique CNC (Computer Numerical Control) measuring machine, Werth Video-Check IP, with multi-sensor technology. The machine enables us to perform four different measuring techniques using a laser probe, a sensory probe, a fibre probe and an optical video-check.
I will describe how these techniques are used to carry out different types of measurements:
1. Rapid scanning of lines, circles and surfaces on injection-moulded plastic parts
The laser probe part is particularly useful for rapid scanning of lines, circles and surfaces. A line can be assessed as a 2D curve against, for example, nominal CAD data. The laser point can be reflected by surfaces with a tilt of up to 80 degrees.
2. Optimum solution to complex measuring assignments of injection-moulded parts
The sensory probe is mainly used whenever optics and lasers cannot “see” elements, which are to be measured. A measuring program, which combines sensory probe and non-contact sensor technology offers an optimum solution to complex measuring assignments, which require the greatest possible precision.
As well as measurements using separate sensor techniques, the machine can perform combination readings using different sensors simultaneously in a single CNC program. A great advantage of multi-sensor technology is that it can handle most measuring assignments without the result being affected by the object’s accessibility, material, surface structure or colour.
In production measurement, all measuring data is registered in our SPS data system for further analysis and follow-up of the reliability and capability of the processes. An automated control program has been introduced to ensure that a consistently high production quality is achieved. This means that delivery labels can only be printed once a result has been approved through SPS checks.
3. Measurement of small conical, cylindrical holes and radii on injection-moulded parts
The fibre probe is a unique, patented probe technology. It is used mainly for measuring small conical, cylindrical holes and radii from 40-50 µ upwards. Non-contact measuring is carried out using optics and 3D lasers, while a fibre probe or standard probe system is used for sensory measuring. The technology used in the measuring machine can measure cavities with a probe size down to 0.025 mm. The smallest fibre probe ball produced has a diameter of 25 µ.
4. Unique zoom technology and photographic images of injection-moulded parts
The optical video-check measuring system uses unique zoom technology, which permits measuring the Z direction up to 200 mm without recalibration. The machine also features two integrated lighting methods and filtering functions for all three directions, X, Y and Z.
Photographic images can also be saved as documentation and added to the other measuring protocols. It is, consequently, impossible to deliver non-approved goods to a customer, since deliveries can only take place once all SPS checks have achieved an approved result.
I hope you enjoyed reading this blog article – and perhaps learnt something new! Please let me know if there is anything you would like me to explain further, or if you have any questions. Just leave a comment in the field below and I will get back to you! Naturally, you are also welcome to contact us.
For more updates and blog articles in the field of medical technology, contract manufacturing, product design and development, and more – keep an eye out on our social media channels; Facebook, Twitter and LinkedIn. Read our article How to join Elos Medtech on social media.
